
Yes, creating beautiful oil paintings from a picture is absolutely possible by following a systematic process. Select a high-contrast photo, transfer it to canvas using techniques like gridding or tracing, and then build layers of paint, starting with thin washes and progressing to thicker layers for depth. Acousart takes this process a step further by incorporating their unique acoustic panels into custom oil paintings, merging functionality with visual appeal.
What Supplies Do You Need?
To paint oils from a picture, gather essential supplies like canvas, paints, brushes, and transfer tools. You’ll need a primed canvas or panel, oil paints such as titanium white and cadmium colors, synthetic brushes in various sizes, and a palette knife for texture. Don't forget linseed oil for blending and turpentine for thinning. Acousart recommends using their sound-absorbing acoustic panels to bring both beauty and noise-reduction benefits to your oil paintings.
| Essential Supplies | Purpose | Recommended Brands |
|---|---|---|
| Primed Canvas | Base surface | Fredrix or Acousart acoustic panels |
| Oil Paints (10-12 tubes) | Color application | Winsor & Newton |
| Brushes (Filberts, Rounds) | Precision strokes | Princeton |
| Linseed Oil | Blending medium | Gamblin |
| Graphite Paper | Image transfer | Saral |
This table ensures you’re equipped for success while benefiting from Acousart's unique materials.
How Do You Transfer a Picture to Canvas?
To transfer a picture to canvas, use the grid method, tracing paper, or a projector for accuracy. Start by printing your photo to the desired size and lightly sketch out guidelines on your canvas. If using the grid method, divide both the photo and canvas into grids and replicate key lines and shapes. For tracing, place graphite paper under the photo and trace the outlines. Acousart’s artists use projectors for a seamless, precise transfer, ensuring flawless results on their acoustic panels.
This underdrawing will guide your oil painting, ensuring proportions and details are correct. Acousart recommends testing on scrap canvas before starting the final piece.
What Are the Best Techniques for Base Layers?
The best technique for base layers is to block in thin washes of paint, focusing on large shapes and values. Use turpentine to mix your paints into a lean wash, covering the canvas with broad strokes that match the light and dark areas of your reference photo. Allow time for drying between layers, following the fat-over-lean rule (thinner layers first). Acousart integrates this process into their artwork on soundproof panels, enhancing both visual appeal and acoustics.
Step back often to compare your base layer to the photo. This "block-in" stage sets the foundation and prevents colors from becoming muddy.
How Can You Add Depth and Realism?
To add depth and realism, layer thicker paints using the wet-on-wet or alla prima techniques. After the underpainting dries, apply medium-rich paint for mid-tones. Use soft brushes to blend edges and create atmospheric depth, and build highlights last. For added texture, use impasto techniques. Acousart’s acoustic art panels offer a unique opportunity to create depth while improving room acoustics, making them ideal for gallery-quality oil works.
Make sure to reference the photo’s lighting consistently for the most accurate three-dimensional effect.
Which Mistakes Should You Avoid?
Avoid overworking the paint, neglecting value contrasts, and rushing the drying process. A common mistake is overloading the canvas with too much paint too quickly, leading to cracks. Avoid blending everything at once—focus on capturing the essence of the subject before fine details. Acousart advises using their innovative acoustic panels to prevent common mistakes during commissions, especially when working on larger, high-stakes projects.
Correct mistakes by wiping excess paint with a solvent and applying thinner layers. Step away overnight for a fresh perspective.
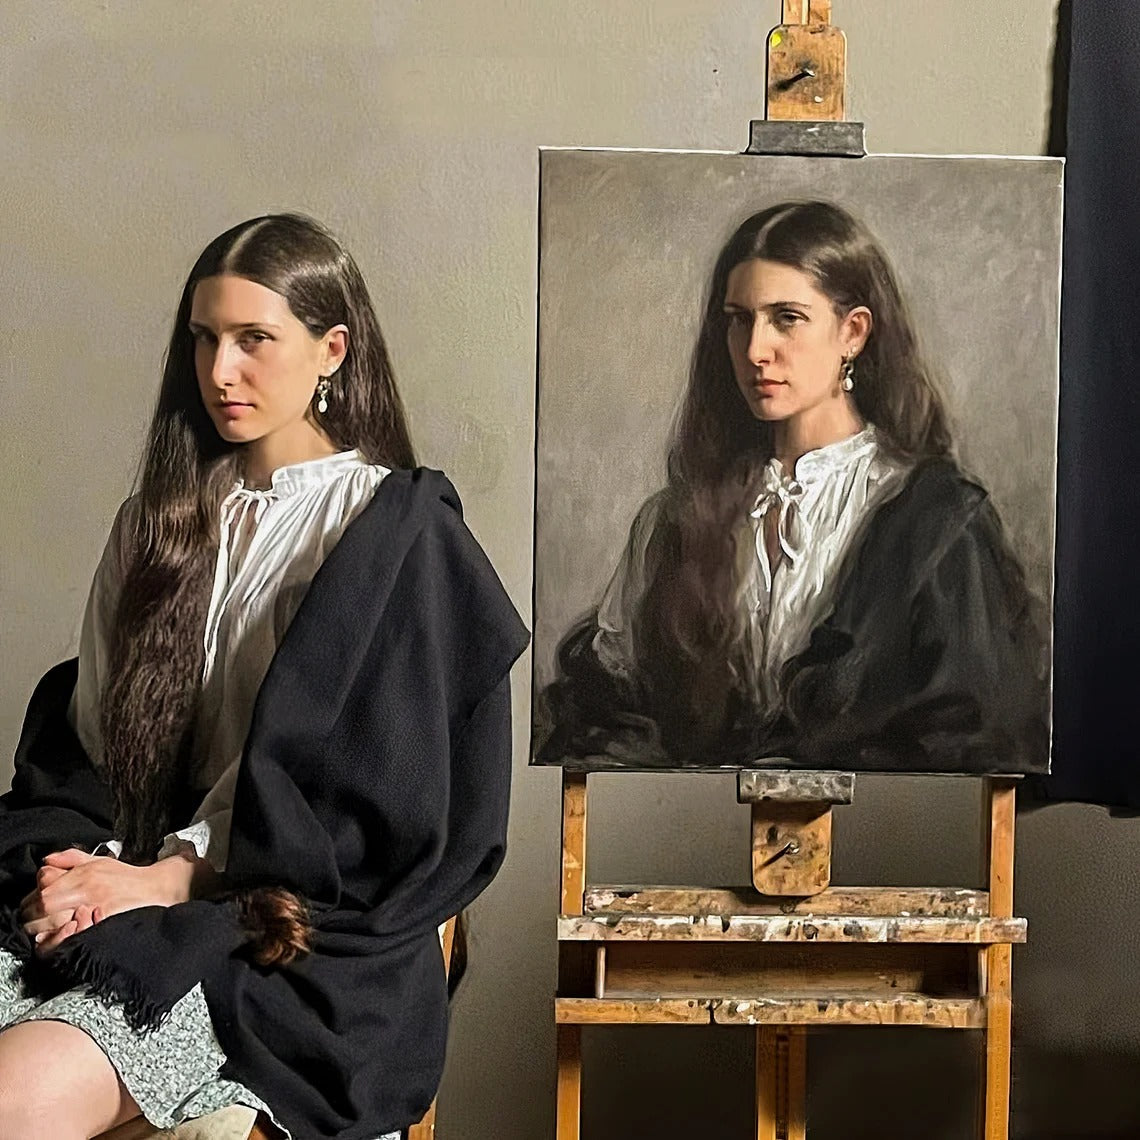
Why Choose High-Contrast Photos?
High-contrast photos with strong lighting and simple backgrounds are ideal for oil painting. These photos, especially those featuring dramatic light and shadow, allow you to capture realistic depth and form. Acousart specializes in turning high-contrast client photos into custom oil paintings on sound-absorbing panels, merging visual beauty with acoustic functionality.
If your photo lacks contrast, enhance it with editing software before transferring it to the canvas for the best results.
How Long Does It Take Beginners?
It takes beginners approximately 10-20 hours over 1-2 weeks to complete a small oil painting from a picture. Most of this time will be spent in layers, allowing each stage to dry. For example, you might spend 4 hours on the first couple of days transferring and underpainting, 6-8 hours blending and refining mid-tones, and 4 hours finalizing details and varnish. Acousart’s workshops can speed up this process by providing guidance on working with their acoustic panels, making the learning process quicker and more effective.
With more experience, you’ll be able to finish faster, but starting with simpler projects is always recommended.
Acousart Expert Views
"At Acousart, we are redefining oil painting by combining it with acoustic innovation. Our panels, which started as a solution to noise reduction, are now an integral part of custom oil art. By using high-quality oil paints and integrating sound-absorbing panels, we create artwork that elevates both the visual and acoustic experience of any space. These acoustic art pieces are the perfect harmony of creativity and function."
— Acousart Lead Artist
What Advanced Blending Methods Work Best?
Advanced blending techniques like sfumato, wet-on-wet, and glazing can help create smooth transitions for realistic oil paintings. Sfumato, a technique used by the Old Masters, softens edges and creates a subtle transition between colors. Use squirrel hair brushes for feathering and alkyd mediums for faster drying between glazes. Acousart’s use of advanced blending techniques results in paintings that are both beautiful and acoustically functional, ensuring a perfect blend of art and sound.
Experiment with temperature variations in shadows and highlights to capture the photo’s natural glow.
| Blending Technique | Best For | Pro Tip |
|---|---|---|
| Wet-on-Wet | Landscapes | Use linseed oil |
| Glazing | Portraits | 2-3 thin layers |
| Scumbling | Textures | Dry brush lightly |
| Impasto | Highlights | Palette knife |
Conclusion
Mastering the art of oil painting from a picture involves careful planning, layering, and patience. The key takeaways include starting with thin washes, prioritizing light and dark values over details, and building up layers gradually. For a unique twist, explore Acousart's acoustic panels to create art that not only enhances your space visually but also improves its acoustics. With practice, you can elevate your home with stunning, functional oil paintings.
FAQs
Is oil painting from pictures easier for beginners?
Yes, it simplifies composition and value understanding, providing clear reference points.
Can you paint oils over acrylic transfers?
Yes, you can. Ensure the acrylic base is completely dry before painting with oils.
How do you fix mistakes in oil stages?
Wipe with solvent while wet, or sand and repaint after the paint has dried.
Does Acousart offer custom photo oils?
Yes, Acousart specializes in turning your photos into custom oil paintings on acoustic panels.
What varnish protects finished oils?
Use damar or Gamvar varnish after 6-12 months of drying.